Mastering Rice Pilaf: Simple Steps for a Versatile Side Dish
Transforming ordinary rice into an extraordinary culinary experience is simpler than you might think. Enter rice pilaf – a humble yet incredibly versatile side dish that elevates any meal. Far from being just plain boiled grains, a well-executed rice pilaf boasts separated, fluffy kernels, infused with rich flavors and aromas. It's a technique that has captivated home cooks across cultures, from bustling Middle Eastern kitchens to elegant European dining tables, offering a canvas for endless creativity.
Whether you're looking for a reliable accompaniment for a busy weeknight dinner or a show-stopping side for a holiday feast, mastering rice pilaf is a fundamental skill that pays dividends. This guide will walk you through the essential steps, demystifying the process and equipping you with the knowledge to craft perfect, flavorful pilaf every time. Prepare to unlock a world of taste and texture that goes beyond plain rice.
The Core Secret to Unforgettable Rice Pilaf
At its heart, rice pilaf isn't just a recipe; it's a cooking method centered on two crucial steps that distinguish it from standard boiled rice:
- Sautéing the Rice: Before any liquid is added, the rice grains are toasted in butter or oil. This step is pivotal. The heat gently browns the surface of each grain, initiating the Maillard reaction, which develops a deeper, nuttier flavor. More importantly, it creates a protective barrier around each grain, helping them stay separate and fluffy during cooking, rather than clumping together.
- Cooking in Broth: Instead of plain water, rice pilaf simmers in flavorful broth or stock. This simple substitution imbues the rice with a profound depth of flavor and richness that water simply cannot replicate. Whether it's chicken, vegetable, or even beef broth, the liquid becomes an integral part of the dish's character.
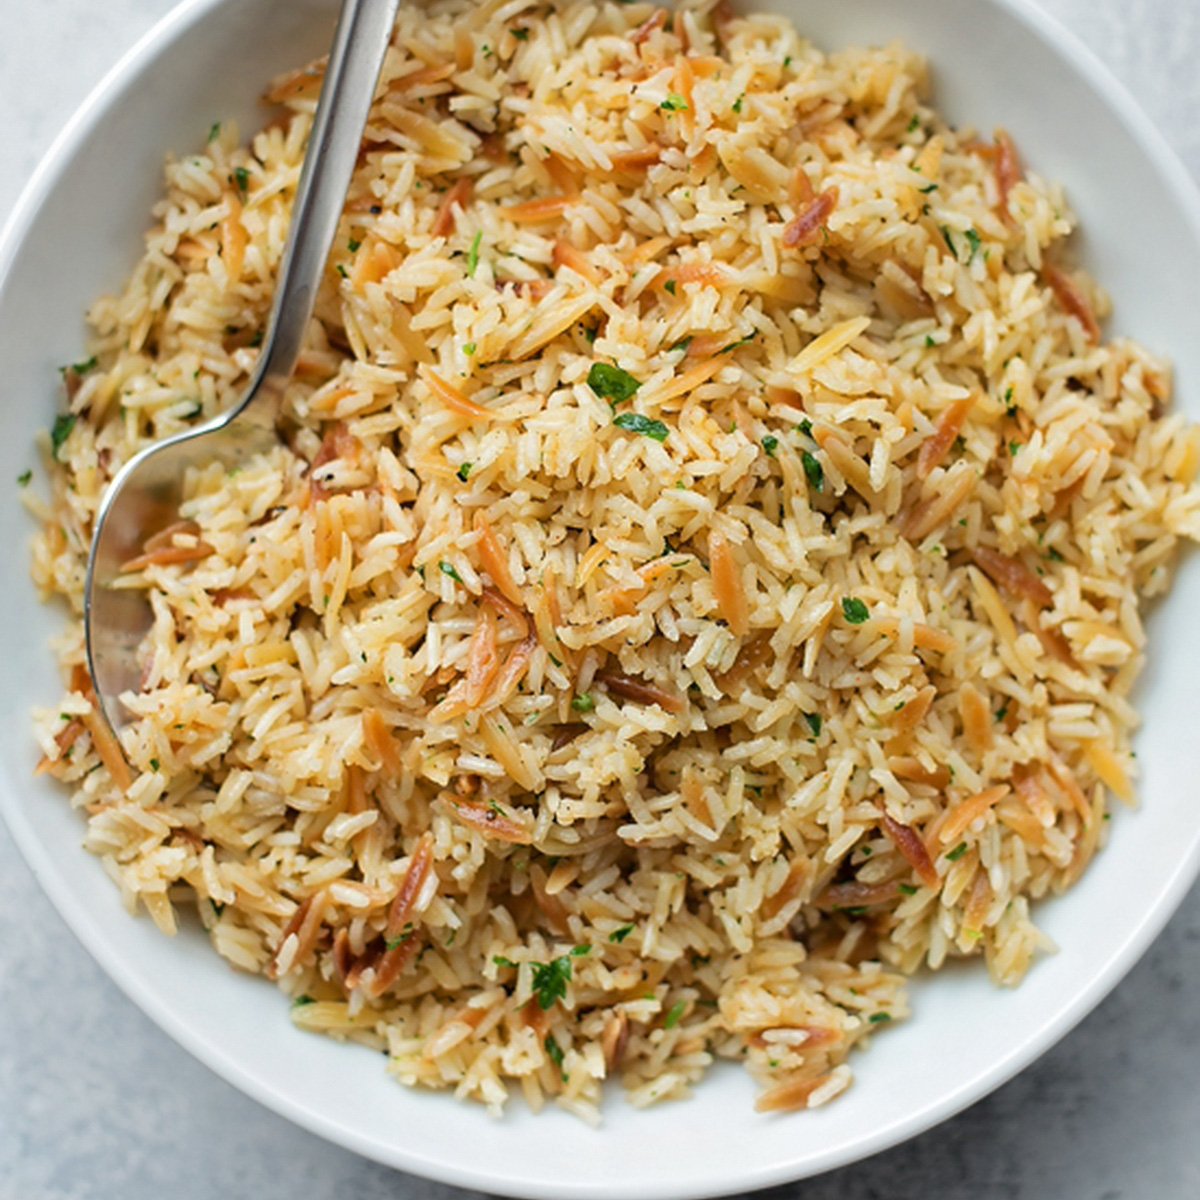
These two techniques combine to produce a side dish that is far more engaging and satisfying than its straightforward ingredients might suggest. The result is consistently fluffy, aromatic, and perfectly separated grains of rice, ready to complement virtually any main course.
Crafting Your Basic Rice Pilaf: A Step-by-Step Guide
While the concept of easy rice pilaf is simple, attention to detail ensures perfect results. Here’s how to build your foundational pilaf:
Choosing Your Ingredients Wisely
- The Rice: Long-grain white rice varieties like Basmati or Jasmine are ideal for pilaf due to their lower starch content, which promotes separate, fluffy grains. While some recipes use medium-grain rice, long-grain is generally preferred for its elegant texture.
- The Fat: Unsalted butter adds a rich, creamy flavor, while extra virgin olive oil offers a Mediterranean twist and can make the dish diet-friendly. A combination of both can also be used for complexity.
- The Broth: Opt for good quality chicken, vegetable, or beef broth. Low-sodium varieties allow you more control over the final seasoning.
- Aromatics: Finely diced onion and minced garlic are the classic starting point, providing a fragrant base.
- Seasonings: Salt and freshly ground black pepper are essential. Beyond that, the world is your oyster!
The Essential Process for Fluffy Pilaf
- Preparation is Key: Begin by rinsing your rice under cold running water until the water runs clear. This step is crucial for removing excess starch, which helps prevent stickiness. Drain thoroughly.
- Sauté the Aromatics: In a medium pot or Dutch oven with a tight-fitting lid, melt your butter or heat your oil over medium heat. Add finely diced onions and sauté until softened and translucent, about 3-5 minutes. If using garlic, add it in the last minute to prevent burning.
- Toast the Rice: Add the rinsed and drained rice to the pot. Stir continuously for 3-5 minutes, allowing the rice to toast until it becomes slightly opaque and emits a nutty aroma. This is where the magic happens, developing flavor and ensuring separate grains.
- Add Liquid and Seasoning: Pour in the broth and add salt and pepper to taste. Bring the mixture to a rolling boil.
- Simmer to Perfection: Once boiling, reduce the heat to the absolute lowest setting, cover the pot tightly, and let it simmer undisturbed for 15-20 minutes, or until all the liquid has been absorbed. Resist the urge to lift the lid! This allows the steam to do its work.
- Rest and Fluff: Once the cooking time is up, remove the pot from the heat and let it rest, still covered, for an additional 5-10 minutes. This resting period allows the steam to redistribute, resulting in even fluffier rice. Finally, remove the lid and gently fluff the flavorful rice with a fork before serving.
Elevating Your Pilaf: Creative Variations and Customization
The beauty of rice pilaf lies in its incredible adaptability. Once you master the basic technique, you can embark on an exciting journey of customization, transforming your pilaf to suit any palate or cuisine.
A World of Flavors: Spices, Herbs, and Aromatics
The simple base of onions and garlic is just the beginning. Consider these additions to infuse your rice pilaf with unique character:
- Middle Eastern Flair: Warm spices like turmeric (for color and earthy notes), coriander, cumin, and paprika are hallmarks of authentic Middle Eastern rice pilaf. A pinch of cinnamon or allspice can add a subtle, sweet complexity.
- Mediterranean Vibes: Fresh or dried oregano, thyme, and a bay leaf can transport your pilaf to the shores of the Mediterranean. A squeeze of lemon juice at the end brightens the flavors beautifully.
- Herbal Freshness: Stir in finely chopped fresh parsley, dill, or mint just before serving for a burst of vibrant color and fresh aroma.
- Umami Boost: A splash of soy sauce or a pinch of mushroom powder can add a savory depth.
Adding Texture: Nuts, Dried Fruits, and Vegetables
Texture contrast is a key element in a truly memorable pilaf. Consider these additions:
- Crunchy Nuts: Toasted slivered almonds, pine nuts, pistachios, or walnuts add a delightful crunch. Toast them separately in a dry pan until fragrant, then stir them in at the end.
- Sweet & Chewy Dried Fruits: Golden raisins, dried cranberries, or chopped apricots can introduce a lovely touch of sweetness and chewiness, especially complementary to spiced pilafs.
- Vibrant Vegetables: Peas, diced carrots, corn, or bell peppers can be added during the last few minutes of simmering or stirred in at the end. For heartier vegetables like mushrooms or finely diced zucchini, sauté them with the onions and garlic at the beginning.
- Protein Power: For a more substantial meal, browned ground beef (like in a "hashweh" style pilaf), shredded chicken, or chickpeas can be folded into the finished pilaf.
Baked Rice Pilaf: A Foolproof Alternative
For those who prefer a hands-off approach or want to ensure even cooking, a baked rice pilaf method can be incredibly forgiving. After sautéing the aromatics and toasting the rice on the stovetop, transfer the mixture to an oven-safe dish, add the boiling broth, cover tightly with foil or a lid, and bake in a preheated oven (typically around 350°F / 175°C) for about 20-25 minutes, followed by a crucial resting period. This method often results in exceptionally consistent and fluffy rice without the need to monitor a stovetop burner.
Troubleshooting and Tips for Pilaf Perfection
Even seasoned cooks can encounter a hiccup now and then. Here are common issues and how to avoid them:
- Mushy or Sticky Rice: This usually happens if the rice wasn't rinsed adequately, too much liquid was used, or the lid was lifted too often during simmering. Always rinse thoroughly, stick to the liquid-to-rice ratio (typically 1.5-2 cups liquid per 1 cup rice, depending on rice type), and resist peeking!
- Undercooked or Crunchy Rice: Insufficient liquid or not enough simmering time are the culprits. Ensure your pot has a tight-fitting lid to trap steam effectively, and your heat is low enough to prevent the liquid from evaporating too quickly. If your rice is still crunchy after resting, add a tablespoon or two of hot broth, cover, and let it steam for another 5 minutes off the heat.
- Scorched Bottom: Heat too high during simmering can burn the rice at the bottom of the pot. Ensure your burner is on the lowest possible setting once covered.
Pro Tips for Consistent Results:
- Accurate Measurements: Always use a consistent measuring cup for both rice and liquid.
- Don't Stir During Simmering: Once the lid is on, leave it alone. Stirring disrupts the steam pockets and can break the delicate grains.
- Let it Rest: The resting period is non-negotiable. It allows the grains to absorb any remaining moisture evenly and firm up, resulting in perfectly separated, fluffy rice.
- Taste and Adjust: Always taste your pilaf before serving and adjust seasonings if needed. A final sprinkle of fresh herbs or a dash of lemon juice can brighten everything up.
Conclusion
From its humble origins to its prominent place on tables worldwide, rice pilaf is a testament to how simple techniques can yield extraordinary results. By mastering the art of toasting grains and simmering in flavorful broth, you unlock a versatile side dish that can adapt to countless culinary scenarios. It’s a dish that looks sophisticated but is surprisingly easy to execute, making it perfect for both novice cooks and seasoned chefs alike.
So, the next time you reach for a bag of rice, remember the simple steps to pilaf perfection. Experiment with spices, add a medley of vegetables, or sprinkle in some toasted nuts and dried fruit. The journey to mastering rice pilaf is a rewarding one, promising fluffy, flavorful, and memorable meals for years to come.
